This post serves a test!
Author: miruo
-
UV Pixel Art Demonstration
This is a concept where a Model uses a special UV texture used on a shader to output a Diffuse texture and Normal Texture to emulate the 3D feel.
This method is superior than a 3D Model being rendered at
low-resolution because it avoids the 4D Transforms and avoids the need of a 3D model at run-time.It also allows the creation of many animations
without having to redraw the original image.
Here’s how it works
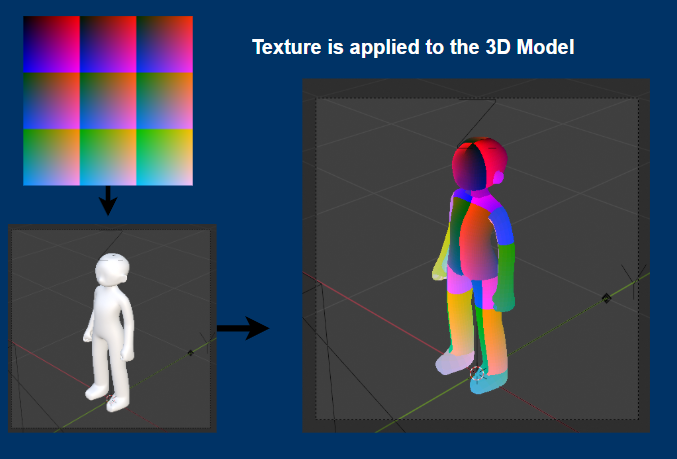
A custom UV is used where each pixel is 8 values apart from each-other.
Red controls horizontal movement.
Blue controls vertical movement.
Green acts as an offset based on the 3×3 region.
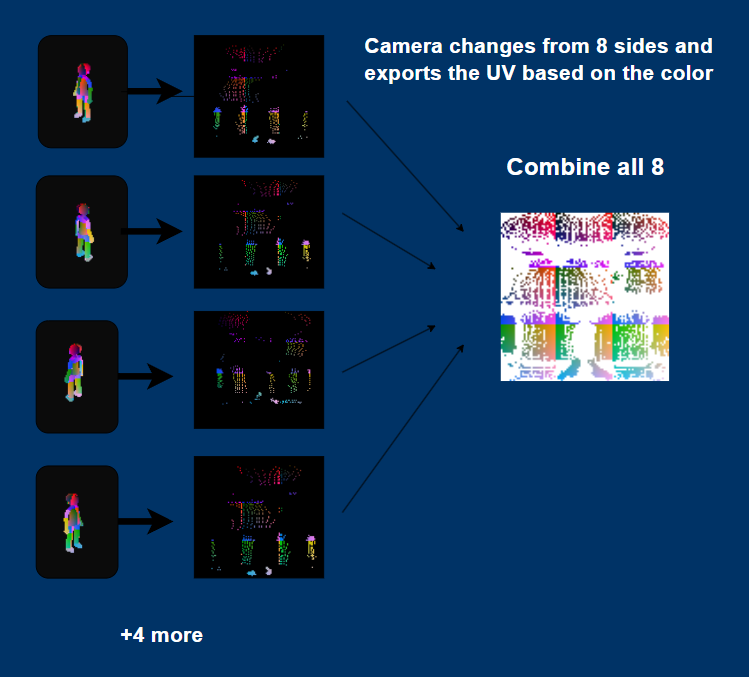
An animation in blender is used to export 8 of the directions
A program is used to correct the outputs from blender exactly to the color in the UV Map. Since the red and blue values are 8 pixels apart, and green is 24 pixels apart from each other. This ensures that the output from blender is a perfect match to the UV Map.
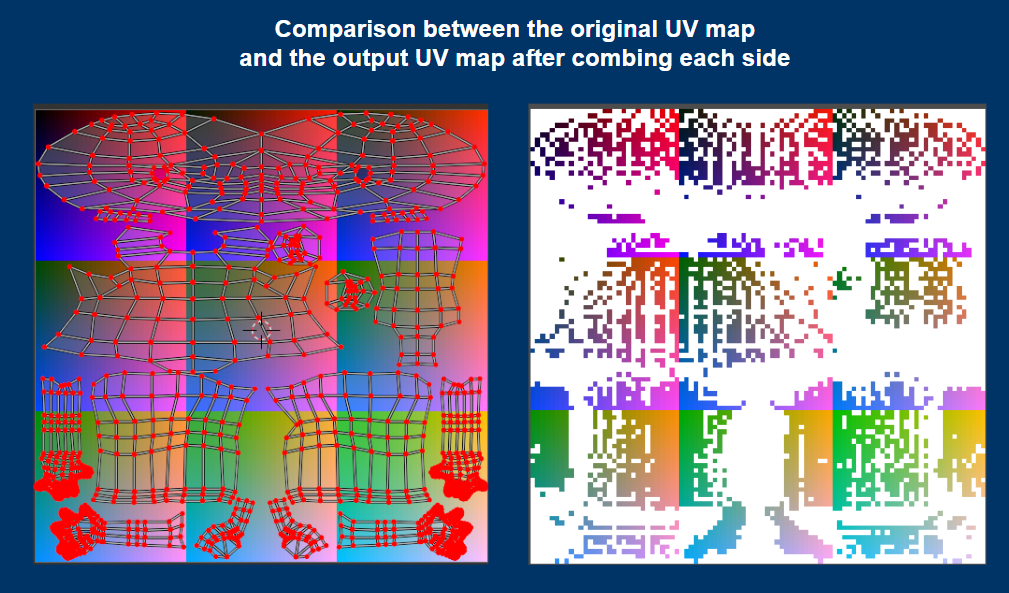
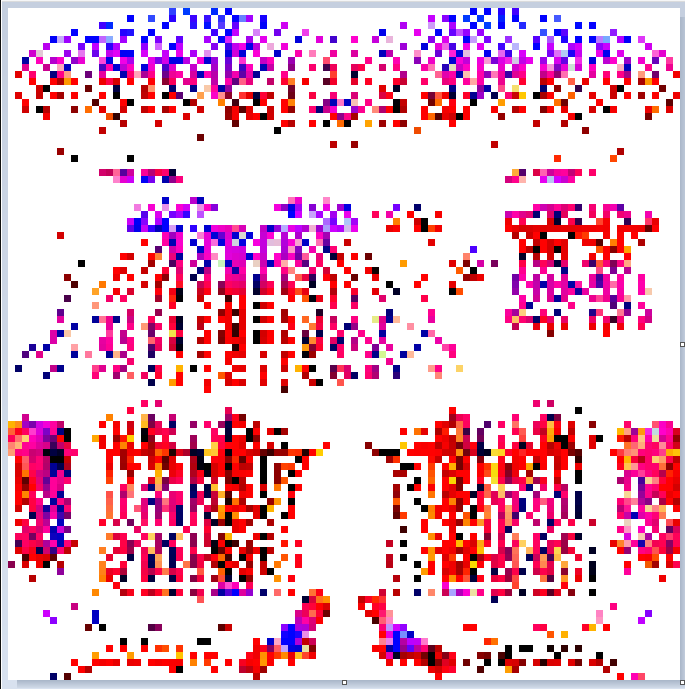
After correcting the pixels it outputs the UV’s accordingly.As you can see, because they are a perfect match, the original UV from blender on the left looks very similar on the right. Some pixels that are not visible will appear white as they are not used.
Now, a shader with the texture coordinate being sampled by UV from the output image is used to output a diffuse texture to create final images.
Here’s what a custom shader would look like:
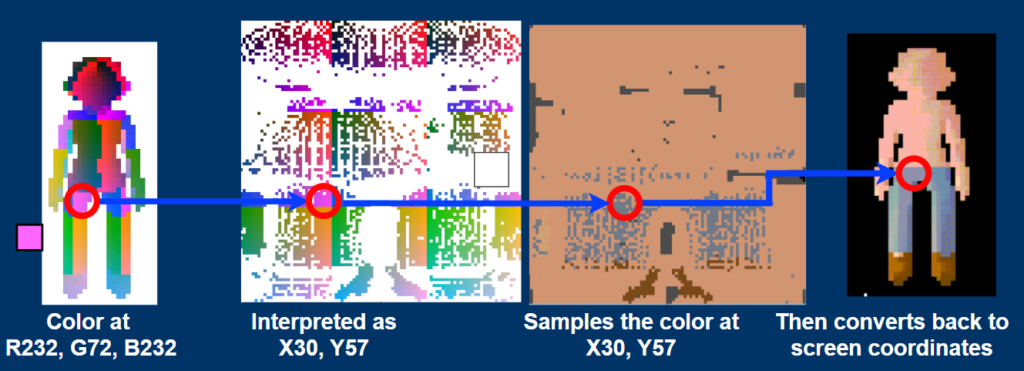
Since all its doing is evaluating the Color than converting into coordinates. It can be reversed to create a bump map. This allows the texture to look like a 3D object and we are able to apply lighting and shading without the complexity of 3D.
However, in this method I opted for a normal used with the diffuse texture, without having to calculate it myself in shader code.
I simply plugged in the normals in blender and used Godot’s CanvasTexture program to input this texture as a normal map automatically.

This completes the explanation of my implementation on
Pixel Art UV MappingCredits to @aarthificial
for their video on
Pixel Art Animation. Reinvented – Astortion Devlog